How to add prismjs to a Silverstripe WYSIWYG editor for syntax highlighting
Prismjs is a javascript plugin that enables syntax highlighting. In this guide we will go through the steps required to use prismjs in your WYSIWYG editor to enable syntax highlighting. For example, if you have a snippet of code you want to embed inside your content in a WYSIWYG editor, prismjs is a good plugin to use.
Here are the steps we will follow to achieve this:
- Download prismjs
- Upload prism to your public directory
- Configure SilverStipe’s TinyMCE to include prismjs
- Update the PageController.php file to include prismjs files
- Flush the cache
- Test prismjs in your WYSIWYG editor
Download prismjs
Follow this link to download the required prismjs files. https://prismjs.com/download.html#themes=prism&languages=markup+css+clike+javascript
Upload prismjs to your public directory
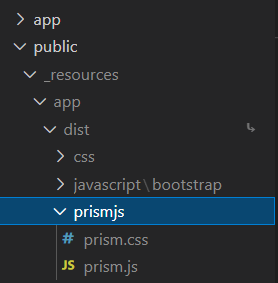
You will need to upload the prismjs files to your static directory. I’ve uploaded the files to my public directory as shown below. However, the structure of your public directory may differ from this.
public -> _resources -> app -> dist -> prismjs
Configure SilverStipe’s TinyMCE to include prismjs
Since the WYSIWYG editor uses TinyMCE we will need to configure TinyMCE to also include prismjs for us to use it. Do this by adding the below code to the app/_config.php file.
use SilverStripe\Forms\HTMLEditor\HtmlEditorConfig;

HtmlEditorConfig::get('cms')->enablePlugins('codesample');
HtmlEditorConfig::get('cms')->addButtonsToLine(1, 'codesample');

/* include the languages you want to use. */
HtmlEditorConfig::get('cms')->setOption(
    'codesample_languages',
    array(
        array('text' => 'CSS', 'value' => 'css'),
        array('text' => 'Scss', 'value' => 'scss'),
        array('text' => 'HTML', 'value' => 'html'),
        array('text' => 'JavaScript', 'value' => 'js'),
        array('text' => 'JSON', 'value' => 'json'),
    )
);
The addButtonsToLine(1, ‘codesample’) lets us add the button for the prismjs plugin at the end of the first line of buttons in the WYSIWYG editor. Notice the array above contains key values pairs of the different languages to include for syntax highlighting. You can add as many valid languages as possible to the array if you desire.
Next, you will also need to include the code below in the app/_config.php file for Silverstripe to recognize the <code> tags inserted by prismjs inside a WYSIWYG when using it.
TinyMCEConfig::get('cms')->setOption(
    'extended_valid_elements',
    'img[class|src|alt|title|hspace|vspace|width|height' .
        '|align|onmouseover|onmouseout|name|usemap],' .
    'iframe[src|name|width|height|title|align|' .
        'allowfullscreen|frameborder|marginwidth|marginheight|scrolling],' .
    'param[name|value],' .
    'area[shape|coords|href|target|alt],' .
    'code'
);
Update the PageController.php file to include prismjs files
Now you will need to tell the PageController.php file to include the prismjs files by adding code similar to the one shown below in your PageController.php file.
use SilverStripe\View\Requirements;

protected function init() {
    parent::init();

    // …

    // prismjs
    Requirements::css("app/dist/prismjs/prism.css");
    Requirements::javascript("app/dist/prismjs/prism.js");
}
Flush the cache
To ensure that all the changes we have made come through properly we will need to flush the cache by appending ‘?flush=all’ to the end of our URL. E.g. http://localhost?flush=all
Test prismjs in your WYSIWYG editor
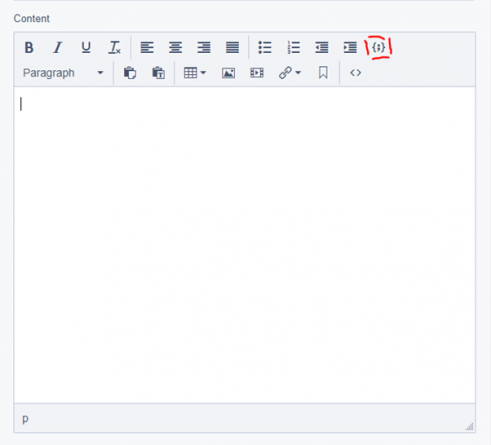
Now we can test if the prismjs plugin is showing up in our WYSIWYG editor. Go to any page that has a WYSIWYG and see if a new button similar to the one shown below shows up. If it is showing, click on it and ensure everything is working as expected.

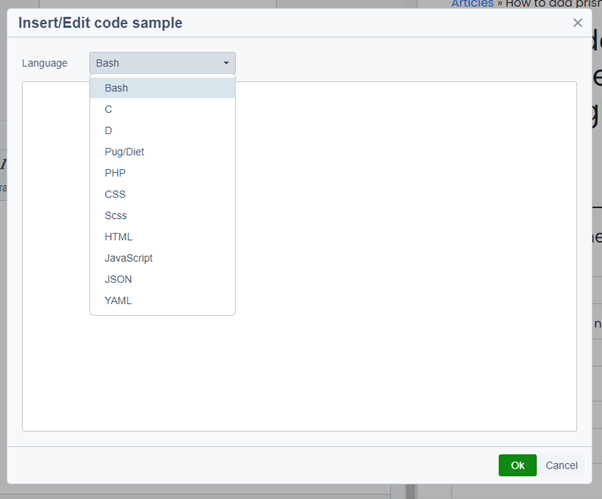
When you click on the new button shown above you will see a text editor with a dropdown of Languages similar to the one below. Go ahead and select the language you want to use and simply write or paste in your code inside the editor and click the 'Ok' button.

Your code will now show up inside the WYSIWYG editor and you can go ahead and save or publish the changes.
Post your comment
Comments
No one has commented on this page yet.
RSS feed for comments on this page | RSS feed for all comments